jueves, 11 de noviembre de 2010

OSSAS!

What is OSSAS?
It's the Oklahoma State Sugar Art Show. The biggest cake competition in the 
USA and around the world. Every year this is the destination for lots of the 
best Cake Designers. The show is directed by Kerry Vincent, who is a judge 
for the TV Show Challenge on the Food Network.

I started attending this event in 2007 and it was amazing. Now it has 
become my favorite event in the "Cake World". I attend every year and mark 
my calendar for the year to come. Not only is it a "Cake Person's" fantasy land 
of inspirational works, it has competitions for all ages and skill levels. 
It's is held  at the Tulsa State Fair, so the entire family can enjoy a 
wide variety of exhibits, rides,games, and foods.

Cake Shows and Competitions.


I hope you enjoy it!
Ta ta!
Edna :)


sábado, 19 de junio de 2010

Cake Contest!

I have decided  to do a cake contest for all my friends around the world. The theme will be "Summer Sensations". Basically anything that has to do with summer is acceptable. Vacations, beach, Summer holidays, Out of school. Let your imagination roll!


Here are the rules for this contest. READ THEM WELL
  • The cake should be 2 tiers. No more or less. 2 tiers.
  • Photos submitted must be of your work.
  • Photos must be of the theme of the contest.
  • No adult themed cakes
  • Limit one entry per person
  • Internationals can participate
  • Only one cake per person, up to 2 photos. I will decide best photo if you send 2
  • Photo have to be submitted before the end date of the contest to designmeacake@hotmail.com
  • No names or watermarks on the photos will be aloud.
  • Real cake should be used in making the cake. No dummies.
The photos have to be send to designmeacake@hotmail.com
This email is only for photos, is not for answering questions, so please only photos for this email. Don't post the photos directly in my page. They need to be submitted by email only. If you do so,
the photo will be disqualified.

I will post the photos in Facebook on a Contest Album where everyone can comment on the photos. No names can be mention in the comments of who made the cake. This can get the photo disqualified. Make sure you send your photos no later than July 31, 2010. That's the deadline for the
photos to be entered. Anything sent after that, wont be posted as part of the contest.

There will be 2 levels. One for Beginners and one for Intermediate to advanced. When you send the photos, send your name location and level of skill. Write the months and years you been
decorating and if this is a hobby or you do this for a living.

There will be 1 price for Beginner and one prize for Intermediate.The prize will consist in a $20.00 gift certificate towards a web store purchase or your choice of one DVD from,
http://designmeacake.biz/


The winner will be announced August, 2010. So start  working on those cakes!

I will send reminders in my
Facebook page.

Don't miss on the fun and join this contest!

Until next blog, ta ta!
Edna :)


miércoles, 2 de junio de 2010

Cheddar Bay Biscuits


I know I usually talk about Cakes, but this time I am posting this recipe by 
popular petition. For those of you who have visited Red Lobster and love 
their biscuits, here is a recipe that is a great copycat of them.
Easy to make and delicious!


Cheddar Buiscuits
Yields: 12
 
Ingredients:
2 1/2 cups Bisquick Baking Mix
4 tablespoons cold butter
1 heaping cup grated Cheddar
3/4 cup cold milk
1/4 teaspoon Garlic Powder
 
Topping:
2 Teaspoons of butter
1/2 Teaspoon Garlic Powder
1/4 teaspoon dried Parsley Flakes
Pinch of salt
 
1. Heat oven 400 degrees F.
2. Mix Bisquick  garlic powder and butter with Pastry
    cutter or a fork (don't over mix). There should be
     pieces of butter the size of peas.
3. Mix in milk and cheese by hand (don't over mix)
 
I did mine in a food processor. Only use the pulse setting.
Just pulse until it comes together, don't over mix, doing so
will give you harder biscuits.
 
4. With ice-cream scoop, drop 1/4-cup portions of dough
    onto a cookie sheet. Bake 15-17 minutes or until biscuits
    tops are golden
 
Topping:
1. Melt butter
2. Add Garlic
3. Add Salt (optional)
4. Brush on top of the biscuits after they are done baking.
 
Nutrition Information:
Calories........................199
Fiber.............................1g
Carbohydrate................17g
Fat................................13g
Sodium..........................428g
Protein...........................5g
 
I didn't have any parsley at hand, and it tasted still wonderful.
Hope you enjoy!
Until next blog....Ta ta!!
Edna :)


How to color Red Fondant/Gumpaste

How to Color Red Fondant or Gumpaste

This tutorial is for those beginners who never have colored fondant 
or gumpaste. I have gotten many emails from beginners wondering why their
 fondant/gumpaste is not reaching the desired color. In this tutorial, I explain 
how to color white gumpaste in a deep shade of red. But keep in mind that this 
works with any dark color you need.

No matter if you are using fondant or gumpaste, you
can follow the same steps. If your fondant gets too 
soft, you can always let it rest for a few days. 
If you need it in a hurry, I sometimes add more 
sugar and at times I have added some Tylose 
to it. It's a matter a preference.
I used Chefmaster color because their pigment is very strong. I love Americolor 
too, but I have find out through experience, that Chefmaster red can get to a 
deeper red. Never be scared of adding color to your fondant and keep in mind,
 fondant and gumpaste  are dry, get to be a bit lighter in color. 
 Click here or in the photo to watch the tutorial.


Until Next Blog...tata!!
Edna :)

miércoles, 19 de mayo de 2010

A New DVD!

I was so busy in the month of April that I barely had a chance to sleep.
I will blog about it andpost photos of my travels and what I been up too
very soon. So in the next few blogs I will  talk more about that.

Today I just wanted to let you know that my latest DVD is already for sale in my website. That kept me busy too! For all those friends that wanted a DVD with smaller flowers, here it is! 
"Blooms and Vines"


DVD Blooms and Vines by Edna De la Cruz

This DVD includes Hydrangeas, Blossoms, Simple blossoms and an Ivy Vine. The Hydrangeas and Blossoms I explain how to make them with cutters and with no cutters. I explain how to make all these flowers and vines and how to color them and how to arrange them.

Gumpaste Hydrangeas

For the Hydrangeas I teach how to do with cutters and veiners and without them. Then you will learn  a simple way to color it or how to add different colors to the flower for a more bold look. Plus you will learn how to make the leaves and put the whole flower together.

Gumpaste Blossoms

The Blossoms is a gorgeous flower. I teach how to make it with cutters and with no cutters. Then I explain how to do a simple bud and a bigger bud. Finally we do leaves, dust the flowers, the buds and
the leaves and put them together in a branch. Blossoms are used a lot these days in wedding cakes. And they for sure attract a lot of attention.

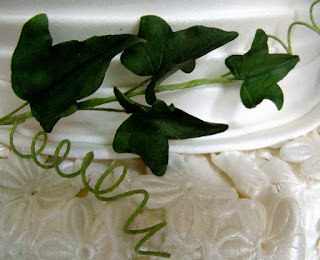
Gumpaste Ivy leaf Vines.

The Ivy vine is a great leaf filler. I teach how to make the leaf,  color it
and how to put the vine together.


The Simple blossom is the easiest filler flower you will ever make. 
You don't need no cutter at all for this flower. Looks great in any arrangement. 
It can be done in all colors and they are fast to make.

This DVD is 169 minutes long. For more information on the tools used in this
tutorial, click here.


See you next time, Ta ta!!
Edna :)


domingo, 10 de enero de 2010

Working with edible glue.

A lot of people ask me all the time about Edible glue. So here is some information on it. Edible Glue is basically used to glue Fondant, Gumpaste, or Pastillaje.

Is it right to use water as glue? The answer is yes. Certain details can be glued with a brush and water, but you have to keep in mind that water is not alcohol based, so it doesn't dry as fast. If you put too much, you will have a real slippery mess.

So, the question is how much is needed? Think about when you clean a table with a moist towel. That's about how much water is needed. Small details like stripes, dots and other things like that
will be fine to glue with water.

Another glue that is very common is your basic extracts. Extracts are alcohol based, so it gives you moisture, but it will dry more than water will.

Next we go to Edible Glue with a little bit of more substance. Why would you need it? Maybe a heavier piece, or a more intricate detail. For example a small swag on a cake or some fondant swirls. And this type of glue is used for making gumpaste flowers as well.

For Edible Glue I start by breaking small pieces of gumpaste into warm water, and letting them dissolve for 15 minutes. You can decide how thick you want your gumpaste to be by how much gumpaste you add to the water. Or if it's too thick, just add more water.
Tylose powder
Click here to get Tylose

The other type of glue is based on Tylose powder. For
this one, you can take a 1/2 cup of hot water and add a
1/4 teaspoon of Tylose to the water. Mix it well and
let it rest so it can cool down and dissolve.
If you want a thicker consistency, add more Tylose.
If you want it more thin, add more water. This is my
favorite gum glue ever. It will last for a long time in
the bottle with no refrigeration.


Both of these you can store in an airtight container, like a small Tupperware or a baby food jar. For a longer shelf life store them in the refrigerator if you want. They can last from 30 to up to 60 days.

Some people will use egg whites for gumpaste flowers as a glue. But if you are not comfortable with raw egg whites, just know you have other options.

Hope this helps!
Until next blog..ta ta!
Edna :)


sábado, 2 de enero de 2010

Ideas for Stargazer Lilies

Hope you had a great New Year day! As I promised, here are some photos 
of Stargazer Lilies on some cakes that I have done through the years. 
This first photo shows what a typical Stargazer Lily looks like. But some 
brides like to bring the colors of their weddings in the color of the flowers
 that they want on the cake.
Gumpaste Stargazer Lily


The first time I ever attempted to do a Stargazer Lily, the Bride
wanted to have it in a purple tone. I thought it might be different
and pretty, plus I was so ready to try one of these flowers.

Gumpaste stargazer lily

If you notice, the center was not done right. I was studying a
photo and confused a natural coloration on the flower, for what
I thought it was part of the flower. But I did learn from this.
Still, I fell in love with the flower.

 The brides loved the look of the cake and it was sold constantly.
Stargazer Lilies in fantasy colors can be just as beautiful as the real ones.

Finally, one day, a bride decided she wanted a navy blue
Stargazer Lily. Imagine how difficult the task was. If I do the whole 
flower in navy blue, I would loose all the beautiful details of the flower. 
Plus, it would not look as delicate. Keep in mind, this is a big flower!

So finally, I decided to do the flower in white, add some blue petal dust, 
and then do the dots in blue. The final result was a lot better than I expected.

Blue gumpaste Stargazer Lily

Wedding cake with blue Stargazer lilies and other gumpaste flowers.

Here is another style. Airbrushed colors. 

Wedding Cake finished with airbrushed Stargazer lilies.

And here is one done in Christmas season. In this cake I used pre-bought
stargazer lilies.

Wedding Cake with white Stargazer lilies

 So here you have it, a few cakes done with stargazer lilies. Some
in the same style but with different colors of the same type of  flower. 
There are so many designs where you can use Stargazer Lilies on cakes.
The flower is pretty easy to learn and a great way to get started 
learning gumpaste flowers. 


Until the next post...ta ta!
Edna :)