domingo, 29 de noviembre de 2015

Flor de Fantasia en Pasta De Goma


Estaba navegando por el internet y vi un hermoso cupcake hecho por "The Pastry Studio". Me contacte con ellos para usar su cupcake como inspiración para un tutorial y me dijeron que sí!
Rosa de Fantasia Cupcake Tutorial


Esta es la foto que encontré. Me encanta la forma en que mezclaron los diferentes tamaños de perlas y grageas. Esta combinacióm hace que se vea muy delicado y elegante. No sé los pasos que ellos utilizaron en la fabricación de estos cupcakes, así que les mostrare cómo yo los haría. No tenía diferentes tamaños de perlas así que use ​​grageas, perlas de azúcar y cristales de azúcar. Pero a mí me gustó mucho las perlas más grandes que ellos utilizaron así que sugiero las añadan para un terminado más delicado y diferente.

Usted necesitará para esta flor 2 cortadores de 5 pétalos. He utilizado los 2 más grandes de este Set de Pétalos de PME. La flor no es difícil de hacer. Si usted no está acostumbrado a hacer flores de pasta de goma, esta es una gran manera de aprender.
Presione  aquí para más información

Cuando hago pasteles, sé que tengo que trabajar rápido. Trabajar por demasiado tiempo en un detalle no es una buena idea cuando usted está tratando de ganar dinero. Esto es algo que tengo en mente cuando hago clases y tutoriales. Queremos que se vea bonito y que sea rápido de hacer.

Esta es la razón por la que menciono las herramientas que utilizo que me ayudan a moverme más rápido cuando estoy trabajando con bizcochos.


Los Celformers ó formadores de flores, son uno de mis materiales favoritos. Esta es una de esas herramientas que uso para algunas de mis flores y hacen mucho más fácil secarlas en la forma deseada. Yo los cubro en papel de aluminio para poder volver a utilizar el formador con otra flor. Así puedo seguir haciendo flores sin tener que esperar a que una seque
Presione aquí para más información


El tutorial es muy detallado. También puede añadir más detalles a la flor utilizando los Polvos de Pétalo si desea añadir más detalles. Yo no le añadí color en el tutorial porque quería mostrar la versión simplificada de la flor.

Algunas personas dicen que esto es mucho trabajo para un cupcake, y sí lo es, así que asegúrese de cobrar bien por el trabajo que hacen. La otra opción será la de mezclar este cupcake con otros que tienen un diseño más simple. La flor también se puede utilizar en pasteles.

No importa en donde usted prefiera utilizar la flor, es fácil de aprender . Espero que disfruten del Tutorial. Haga clic en la foto para ir a ver el tutorial.

Presione aquí para ver el Tutorial

Espero les guste el Tutorial, Hasta la próxima, ta ta!

Edna ;)


viernes, 25 de septiembre de 2015

Receta de Frosting de Chocolate

Tutorial y Receta de Frosting de Chocolate


El chocolate es mi adicción! ¡Simplemente me encanta! Tengo una receta 
en mi website para un Crusting Buttercream de Chocolate que es muy buena. 
Esa receta es ideal para pasteles que van a ser montados en pisos y que 
necesitan un frosting que aguante calor o humedad. La manteca vegetal 
emulsificada en esta receta ayuda a estabilizar el frosting.

La receta que estoy publicando aquí, (haz clic aquí para ver la receta), 
es una receta que yo uso todo el tiempo para mis pasteles personales. 
Está hecho con mantequilla y no contiene manteca vegetal. Es delicioso 
y muy fácil de hacer. Por lo general, me gustan las recetas que crean 
una capa  que se puede suavizar para que se vea como la pasta laminada. 
Esta receta no crea esta capa como la receta que aparece más arriba, 
pero hace suficiente costra para ser ligeramente alisada con el papel Viva.
Si usted no ha utilizándola técnica del Papel Viva, puede hacer clic aquí 
para ver el tutorial.


Receta de Frosting de Chocolate

Hice un tutorial paso a paso de esta receta que añadí en mi página web. Uno de los 
beneficios de esta receta es que usted puede usarla con la manga pastelera y puede hacer hermosos bordes.

El pastel puede quedarse fuera de la 
nevera durante un par de horas, siempre 
y cuando lo deje en una habitación con 
aire acondicionado. Si usted vive en un 
estado que es más frío que Florida, probablemente pueda usarlo en sus pasteles de pisos. Pero haga una prueba antes de usarlo en un pastel para un cliente.  Asegúrese de usar mantequilla y  no la margarina cuando haga esta receta.


Me encanta usar este frosting con mi receta de pastel de chocolate. Si te gusta el chocolate, esta es la combinación perfecta. Voy a trabajar pronto en el tutorial 
para el pastel de chocolate para poder postearlo también. Mientras tanto, espero que disfruten la receta tanto como yo. Vea a continuación el enlace a la receta y tutorial.

Tutorial y Receta de Frosting de Chocolate


También les quería mencionar que acabo de abrir un nuevo canal de You Tube dedicado solamente a tutoriales en español. Aquí les dejo el link para que se subscriban, presione aquí.
Recuerden que You Tube hizo unos cambios y para recibir notificaciones usted tiene que después que se suscriba, presionar el circulo que aparece al lado del botón de suscripción y esto abrirá una ventana donde usted puede aceptar recibir notificaciones cuando postee nuevos tutoriales.
También se puede suscribir al Blog porque también lo posteo aquí.

Hasta la próxima, ta ta!
Edna :)

jueves, 30 de julio de 2015

Galleta de Nuez de Macadamia con Chocolate Blanco


Galleta con Macadamia Nut y Chocolate Blanco

Me encantan las nueces de macadamia . Aprendí con mi padre a comerlas y es
una de mis galletas favoritas con la adición del chocolate blanco. Tenía algunos
de los ingredientes y decidí hacer estas deliciosas galletas.

No estoy segura de quién es el creador de esta receta , ya que me la dió una amiga mía. Ésta receta es perfecta, no había nada que arreglar en ella, las galletas son muy deliciosas. Estoy añadiendo una serie de consejos en éste blog para que ustedes logren una galleta perfecta.
Haga clic aquí para obtener la receta.
Macadamia Nut and White Chocolate Cookies

Hay una ciencia para hornear galletas . He leído en los últimos años mucha gente hablando de cómo quieren que sus galletas queden más suave , mientras que otras personas las quieren más crujientes. Pero la mayoría de las personas se preguntan , ¿Por qué mis de galletas me salieron planas?

Hay tantas razones para que las galletas pueden salir mal . Una de estas razones
puede ser causa de los ingredientes. El exceso de azúcar puede hacer que la
galleta se esparza demasiado. Pero uno de los factores que las personas no
figuran la mayoría de las veces es la mantequilla. La margarina, por ejemplo,
se extenderá más que la mantequilla , ya que contiene más grasa y es más suave.

Otra razón por la que las galletas se pueden esparzir es que hay gente que pone las galletas en una bandeja caliente que acaba de salir del horno. El calor de la bandeja causará que la mantequilla se comienze a derretir antes de que tenga la oportunidad de que se cocine y endurezca. Así que eviten la colocación de galletas en una bandeja de horno caliente ó asegurarense de que se muevan rápido si deciden hacerlo. Tengan las galletas hechas para que así sea cuestión de colocarlas muy rápido en la bandeja y luego al horno lo más rápido posible.

A veces la gente usa demasiada mantequilla o aceite en la bandeja que puede crear que las galletas se expandan demasiado mientras se está cocinando. Yo a veces uso el papel de aluminio antiadherente y es rápido para limpiar, además de que no tengo que añadir nada a la bandeja. Las galletas no se adhieren al aluminio. También puede utilizar un Silpat, (mat de silicone para hornear), que es muy bueno para esto.

Asegúrese de que no bata su mezcla demasiado. Esto sólo crea aire y el aire puede causar bolsillos que cuando hornee se  van a desinflar, causando que la galleta se aplane. Por lo general yo tiendo a poner la masa de las galletas en la nevera. Como la mantequilla en la receta se utiliza a temperatura ambiente, al poner la mezcla en la nevera, la mantequilla se endurece y esto ayuda a que las galletas se mantengan más gorditas.
Macadamia Nut and White Chocolate Cookies

Si sigues todos estos pasos y usted todavía tiene problemas con sus galletas,
puede dividir la  mantequilla y compensarla con manteca vegetal. Hay gente
que cambia la mantequilla por completo por la manteca vegetal y hay algunos
que usan la de sabor a mantequilla. Si usted es como yo, y no quiere renunciar
al sabor de la mantequilla natural, entonces usted tiene una opción más. Baje
la temperatura del horno. Todos hornos son diferentes. Si, se supone que las
temperaturas deben ser las mismas en todos los hornos, pero de alguna manera
las cosas cambian entre un horno a otro. Así que si usted ha intentado todo y las
galletas no están cooperando con usted, baje la temperatura de el horno a
300 grados. Se tomará un poco más de tiempo para hornear, alrededor de
24 minutos minutos para galletas más suaves y 30 si te gustan más crujientes.
El tiempo de horneado es sólo una aproximacion, dado que cada horno funciona
diferente, sólo asegúrese de echarles un ojo para que no se les quemen.

Hay muchos factores que pueden hacer que una receta de galletas salga mal.
Esta receta ha sido probada y funciona muy bien. Así que si usted no se
encuentra satisfecho con el resultado, trate la receta de nuevo y use los
consejos sujeridos. Estoy segura de que ustedes tienen sus propios
consejos así que siéntanse en libertad de compartirlos. Mientras tanto,
espero que ustedes disfruten de esta receta. (Haga clic aquí para la receta)

Hasta el próximo blog, ta ta!
Edna

sábado, 18 de julio de 2015

Decoracion de Cupcakes- 4 de Julio.


                   For english press here.

Hice éste cupcake para la celebración del 4 de Julio, así que decidí filmar
mientras lo decoraba. No lo he traducido, pero es bastante visual.
(Presione aquí para ver el video). Me encanta éste diseño. Se que
mucha gente va a decir, "es demasiado trabajo para un solo cupcake".
Y sí, tiene su trabajo. Algo que me gusta de los cupcakes es que no
todos tienen que tener el mismo diseño. De ésta manera, los que hagan
con diseños más complicados se lucirán más.


Strip Cutter
Aquí pueden ver el cupcake terminado.
Usé una regla especializada para cortar lineas.
Cualquier herramienta que me ayude trabajar
más rápido, siempre es bienvenida.

.


Me encantan los cortadores de la compañía JEM. Ellos han creado una serie de
cortadores que se pueden poner en un foam que ellos crearon especificamente
para poder cortar al revés. Algo que siempre me ha gustado hacer pués uno se
asegura que los cortes estén limpios. Presione en las foto para más información.


Mientras hacía las rosas, tomé ésta foto. Me encanta hacer rosas en miniatura.
Tengo varias formas de hacerlas y eventualmente pondré un video avanzado
de como las hago. En el video las hago sin cortador.

http://designmeacake.biz/Gold-Highlighter-for-Cake-Decorating-AUI-GLD.htm
También le añadí  al cupcake estrellas las cuales
pinté en dorado con mi color favorito. Tengo un
tutorial de como pintar detalles en dorado, pero
no lo he traducido al Español todavía. Pero si
desean verlo, presione aquí.


Espero les guste.
Hasta la próxima.. ta ta!

Edna :)


miércoles, 17 de junio de 2015

Pastelillos de Guayaba- Deliciosa Receta Latina


http://designmeacake.com/Pastelillos_de_Guayaba.html


Éste Blog no va a ser sobre tortas.Voy a hablar sobre un rico postre de la cultura Latina, los Pastelillos de Guayaba. Yo crecí en Puerto Rico y mi a mi Madre le fascinaba este postre.

El otro día estaba en el supermercado y ví una caja de pastelillos. No he comido uno en muchos años y decidí olvidar la dieta y comprarlos. No quedé satisfecha con ellos. No le pusieron casi relleno.

Decidí en ese momento que quería comer uno bien hecho así que tendría que hacerlos yo misma. No quería hacer la masa de hojaldre porque toma tiempo hacerla y queria algo rápido. Así que me fuí al supermercado a comprarla. 
Pasta de Hojaldre


La Masa de Hojaldre de Philsbury se consigue en la area de productos refrigerados. Para los que nunca han trabajado con la masa de hojaldre, mantenga en mente que se debe matener fria. Si se calienta cuando la está trabajando, se pone pegajosa y más difícil de trabajar. Ésto sucede porque la masa esta hecha con mantequilla y no lleva levadura.

Si se preguntan como es que ésta masa sube sin tener levadura, es porque la masa se estira y se dobla hasta que forman cientos de hojas finas. Cada hoja contiene mantequilla. Cuando la masa se hornea, la mantequilla se calienta y el vapor hace que la masa se separe y suba. Creando un rico y delicado postre.


Como puede ver en la foto, éste postre es muy fácil de hacer. Básicamente, usted corta la masa en cuadrados, añade la pasta de guayaba y el queso crema,(opcional). 

Algo que pueden tener en mente es que con éste postre se pueden usar otros rellenos. Algunos de ellos son, fresas en preserva, chocolate, piña (presione aquí para el tutorial), caramelo con pecans (presione aquí para el tutorial), nutella, manzanas con canela, crema chantilly y muchos otros rellenos.

Presione en la foto debajo para ver el tutorial de como hacer los pastelillos de guayaba. La receta se encuentra debajo del video.


Espero les gusten tanto como a mí.
Hasta la próxima, ta ta!
Edna :)


martes, 19 de mayo de 2015

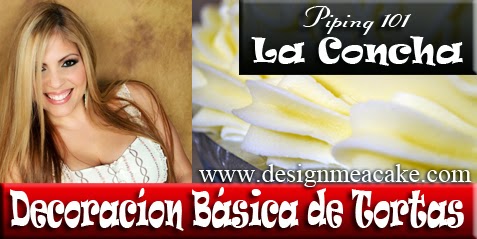
Como Hacer Conchas- Decoracion de Tortas

 Como hacer Conchas- decoracion basica 101


A mi me encanta decorar tortas con diferentes boquillas. Mucha gente piensa 
que no tienen la calidad de trabajo para decorar con boquillas y prefieren usar 
fondant. Pero la realidad es que decorar con boquillas se logra con práctica. 
Para algunas personas se les hace fácil aprender. Otras, requieren más practica. 
Pero no importa que cantidad de tiempo cada persona se tome en aprender, 
una vez se aprende, nunca se olvida.

Siempre le he dicho a mis estudiantes que diseüos con boquilla es como
aprender a escribir. Requiere practica! Pero una vez se aprende, 
nunca se olvida.

Las conchas son una de las maneras más básicas de darle un terminado bonito 
a sus tortas. En el video doy una explicación simple y después procedo a 
explicar con más detalles para personas que están comenzando a 
aprender y requieran más ayuda.

Yo también tuve mis días de principiante. Pero a través con  la experiencia, he 
aprendido como mejorar mis conchas. Comparto con ustedes lo que he 
aprendido y espero les guste.


Hope you enjoy. 
Until next time ta ta!
Edna ;)


P.S.- Este Blog lo tenía desde hace tiempo sin uso. He decidido usarlo para mi Blog en Español. Si prefiere el inglés. presione aquí.
*This is an old Blog I was not using, so I have decided to use it for my Spanish community. For my Blog in English, click here.


jueves, 11 de noviembre de 2010

OSSAS!

What is OSSAS?
It's the Oklahoma State Sugar Art Show. The biggest cake competition in the 
USA and around the world. Every year this is the destination for lots of the 
best Cake Designers. The show is directed by Kerry Vincent, who is a judge 
for the TV Show Challenge on the Food Network.

I started attending this event in 2007 and it was amazing. Now it has 
become my favorite event in the "Cake World". I attend every year and mark 
my calendar for the year to come. Not only is it a "Cake Person's" fantasy land 
of inspirational works, it has competitions for all ages and skill levels. 
It's is held  at the Tulsa State Fair, so the entire family can enjoy a 
wide variety of exhibits, rides,games, and foods.

Cake Shows and Competitions.


I hope you enjoy it!
Ta ta!
Edna :)


sábado, 19 de junio de 2010

Cake Contest!

I have decided  to do a cake contest for all my friends around the world. The theme will be "Summer Sensations". Basically anything that has to do with summer is acceptable. Vacations, beach, Summer holidays, Out of school. Let your imagination roll!


Here are the rules for this contest. READ THEM WELL
  • The cake should be 2 tiers. No more or less. 2 tiers.
  • Photos submitted must be of your work.
  • Photos must be of the theme of the contest.
  • No adult themed cakes
  • Limit one entry per person
  • Internationals can participate
  • Only one cake per person, up to 2 photos. I will decide best photo if you send 2
  • Photo have to be submitted before the end date of the contest to designmeacake@hotmail.com
  • No names or watermarks on the photos will be aloud.
  • Real cake should be used in making the cake. No dummies.
The photos have to be send to designmeacake@hotmail.com
This email is only for photos, is not for answering questions, so please only photos for this email. Don't post the photos directly in my page. They need to be submitted by email only. If you do so,
the photo will be disqualified.

I will post the photos in Facebook on a Contest Album where everyone can comment on the photos. No names can be mention in the comments of who made the cake. This can get the photo disqualified. Make sure you send your photos no later than July 31, 2010. That's the deadline for the
photos to be entered. Anything sent after that, wont be posted as part of the contest.

There will be 2 levels. One for Beginners and one for Intermediate to advanced. When you send the photos, send your name location and level of skill. Write the months and years you been
decorating and if this is a hobby or you do this for a living.

There will be 1 price for Beginner and one prize for Intermediate.The prize will consist in a $20.00 gift certificate towards a web store purchase or your choice of one DVD from,
http://designmeacake.biz/


The winner will be announced August, 2010. So start  working on those cakes!

I will send reminders in my
Facebook page.

Don't miss on the fun and join this contest!

Until next blog, ta ta!
Edna :)


miércoles, 2 de junio de 2010

Cheddar Bay Biscuits


I know I usually talk about Cakes, but this time I am posting this recipe by 
popular petition. For those of you who have visited Red Lobster and love 
their biscuits, here is a recipe that is a great copycat of them.
Easy to make and delicious!


Cheddar Buiscuits
Yields: 12
 
Ingredients:
2 1/2 cups Bisquick Baking Mix
4 tablespoons cold butter
1 heaping cup grated Cheddar
3/4 cup cold milk
1/4 teaspoon Garlic Powder
 
Topping:
2 Teaspoons of butter
1/2 Teaspoon Garlic Powder
1/4 teaspoon dried Parsley Flakes
Pinch of salt
 
1. Heat oven 400 degrees F.
2. Mix Bisquick  garlic powder and butter with Pastry
    cutter or a fork (don't over mix). There should be
     pieces of butter the size of peas.
3. Mix in milk and cheese by hand (don't over mix)
 
I did mine in a food processor. Only use the pulse setting.
Just pulse until it comes together, don't over mix, doing so
will give you harder biscuits.
 
4. With ice-cream scoop, drop 1/4-cup portions of dough
    onto a cookie sheet. Bake 15-17 minutes or until biscuits
    tops are golden
 
Topping:
1. Melt butter
2. Add Garlic
3. Add Salt (optional)
4. Brush on top of the biscuits after they are done baking.
 
Nutrition Information:
Calories........................199
Fiber.............................1g
Carbohydrate................17g
Fat................................13g
Sodium..........................428g
Protein...........................5g
 
I didn't have any parsley at hand, and it tasted still wonderful.
Hope you enjoy!
Until next blog....Ta ta!!
Edna :)


How to color Red Fondant/Gumpaste

How to Color Red Fondant or Gumpaste

This tutorial is for those beginners who never have colored fondant 
or gumpaste. I have gotten many emails from beginners wondering why their
 fondant/gumpaste is not reaching the desired color. In this tutorial, I explain 
how to color white gumpaste in a deep shade of red. But keep in mind that this 
works with any dark color you need.

No matter if you are using fondant or gumpaste, you
can follow the same steps. If your fondant gets too 
soft, you can always let it rest for a few days. 
If you need it in a hurry, I sometimes add more 
sugar and at times I have added some Tylose 
to it. It's a matter a preference.
I used Chefmaster color because their pigment is very strong. I love Americolor 
too, but I have find out through experience, that Chefmaster red can get to a 
deeper red. Never be scared of adding color to your fondant and keep in mind,
 fondant and gumpaste  are dry, get to be a bit lighter in color. 
 Click here or in the photo to watch the tutorial.


Until Next Blog...tata!!
Edna :)

miércoles, 19 de mayo de 2010

A New DVD!

I was so busy in the month of April that I barely had a chance to sleep.
I will blog about it andpost photos of my travels and what I been up too
very soon. So in the next few blogs I will  talk more about that.

Today I just wanted to let you know that my latest DVD is already for sale in my website. That kept me busy too! For all those friends that wanted a DVD with smaller flowers, here it is! 
"Blooms and Vines"


DVD Blooms and Vines by Edna De la Cruz

This DVD includes Hydrangeas, Blossoms, Simple blossoms and an Ivy Vine. The Hydrangeas and Blossoms I explain how to make them with cutters and with no cutters. I explain how to make all these flowers and vines and how to color them and how to arrange them.

Gumpaste Hydrangeas

For the Hydrangeas I teach how to do with cutters and veiners and without them. Then you will learn  a simple way to color it or how to add different colors to the flower for a more bold look. Plus you will learn how to make the leaves and put the whole flower together.

Gumpaste Blossoms

The Blossoms is a gorgeous flower. I teach how to make it with cutters and with no cutters. Then I explain how to do a simple bud and a bigger bud. Finally we do leaves, dust the flowers, the buds and
the leaves and put them together in a branch. Blossoms are used a lot these days in wedding cakes. And they for sure attract a lot of attention.

Gumpaste Ivy leaf Vines.

The Ivy vine is a great leaf filler. I teach how to make the leaf,  color it
and how to put the vine together.


The Simple blossom is the easiest filler flower you will ever make. 
You don't need no cutter at all for this flower. Looks great in any arrangement. 
It can be done in all colors and they are fast to make.

This DVD is 169 minutes long. For more information on the tools used in this
tutorial, click here.


See you next time, Ta ta!!
Edna :)


domingo, 10 de enero de 2010

Working with edible glue.

A lot of people ask me all the time about Edible glue. So here is some information on it. Edible Glue is basically used to glue Fondant, Gumpaste, or Pastillaje.

Is it right to use water as glue? The answer is yes. Certain details can be glued with a brush and water, but you have to keep in mind that water is not alcohol based, so it doesn't dry as fast. If you put too much, you will have a real slippery mess.

So, the question is how much is needed? Think about when you clean a table with a moist towel. That's about how much water is needed. Small details like stripes, dots and other things like that
will be fine to glue with water.

Another glue that is very common is your basic extracts. Extracts are alcohol based, so it gives you moisture, but it will dry more than water will.

Next we go to Edible Glue with a little bit of more substance. Why would you need it? Maybe a heavier piece, or a more intricate detail. For example a small swag on a cake or some fondant swirls. And this type of glue is used for making gumpaste flowers as well.

For Edible Glue I start by breaking small pieces of gumpaste into warm water, and letting them dissolve for 15 minutes. You can decide how thick you want your gumpaste to be by how much gumpaste you add to the water. Or if it's too thick, just add more water.
Tylose powder
Click here to get Tylose

The other type of glue is based on Tylose powder. For
this one, you can take a 1/2 cup of hot water and add a
1/4 teaspoon of Tylose to the water. Mix it well and
let it rest so it can cool down and dissolve.
If you want a thicker consistency, add more Tylose.
If you want it more thin, add more water. This is my
favorite gum glue ever. It will last for a long time in
the bottle with no refrigeration.


Both of these you can store in an airtight container, like a small Tupperware or a baby food jar. For a longer shelf life store them in the refrigerator if you want. They can last from 30 to up to 60 days.

Some people will use egg whites for gumpaste flowers as a glue. But if you are not comfortable with raw egg whites, just know you have other options.

Hope this helps!
Until next blog..ta ta!
Edna :)


sábado, 2 de enero de 2010

Ideas for Stargazer Lilies

Hope you had a great New Year day! As I promised, here are some photos 
of Stargazer Lilies on some cakes that I have done through the years. 
This first photo shows what a typical Stargazer Lily looks like. But some 
brides like to bring the colors of their weddings in the color of the flowers
 that they want on the cake.
Gumpaste Stargazer Lily


The first time I ever attempted to do a Stargazer Lily, the Bride
wanted to have it in a purple tone. I thought it might be different
and pretty, plus I was so ready to try one of these flowers.

Gumpaste stargazer lily

If you notice, the center was not done right. I was studying a
photo and confused a natural coloration on the flower, for what
I thought it was part of the flower. But I did learn from this.
Still, I fell in love with the flower.

 The brides loved the look of the cake and it was sold constantly.
Stargazer Lilies in fantasy colors can be just as beautiful as the real ones.

Finally, one day, a bride decided she wanted a navy blue
Stargazer Lily. Imagine how difficult the task was. If I do the whole 
flower in navy blue, I would loose all the beautiful details of the flower. 
Plus, it would not look as delicate. Keep in mind, this is a big flower!

So finally, I decided to do the flower in white, add some blue petal dust, 
and then do the dots in blue. The final result was a lot better than I expected.

Blue gumpaste Stargazer Lily

Wedding cake with blue Stargazer lilies and other gumpaste flowers.

Here is another style. Airbrushed colors. 

Wedding Cake finished with airbrushed Stargazer lilies.

And here is one done in Christmas season. In this cake I used pre-bought
stargazer lilies.

Wedding Cake with white Stargazer lilies

 So here you have it, a few cakes done with stargazer lilies. Some
in the same style but with different colors of the same type of  flower. 
There are so many designs where you can use Stargazer Lilies on cakes.
The flower is pretty easy to learn and a great way to get started 
learning gumpaste flowers. 


Until the next post...ta ta!
Edna :)

lunes, 28 de diciembre de 2009

Welcome to my Blog!

I love designing and working with cakes as much as I love teaching. As for a
blogger, Im not sure yet..lol We can only hope for the best.. I've been
decorating and teaching for awhile now. I've been posting tutorials in
You Tube and people love them. Cake Friends have been asking for
more tutorials on gumpaste so now I have 2 DVD's for sale on my website  http://www.designmeacake.com/

The first one I did was "How to make a Stargazer Lily".
A flower easy enough for beginners but with details that will attract the more advanced. The second one is "How to Make Poinsettias". But in this blog I will start by talking about the tools I used on this DVD.
 
The tools I used are easy to find. I added some of them
 in my webstore for those who want a one stop shop in the internet. Plus I decided to add in the things I love the most. I will keep adding more of them over time.

For those who are asking about the materials I used to make the Stargazer Lily, here is a photo with the basic things you might use.


  •  wire
  • wire cutters
  • pliers
  • Thick and Thin Foam
  • Ball Tool
  • Needle Tool
  • Florist Tape
  • Petal Dust
  • Cutter
  • Veiner


As for the veiner, even though I teach how to
 use the Wilton one, I do prefer the
Stargazer Lily Veiner. This veiner has beautiful
details that make the flower look incredible.


Another thing I love the most is the Multi Stamen Mold.
Even though I teach how to do the stamens and the center
without it, the mold makes it so easy that once you use it,
you are hooked!

This flower makes a statement, since it's so bold and beautiful.Once you learn to make it, you will absolutely fall in love with it. I will  post some photos of cakes made with the Stargazer in
my next blog, so you can have more ideas on how to use this flower on your cakes.
Remember, you can email me to edna@designmeacake.com or visit my website http://www.designmeacake.com/
In there you will find plenty of Tutorials about cake decorating. 
As for now..this is my first blog!..I will add more to it so don't forget to subscribe.
See you around!

Edna :)